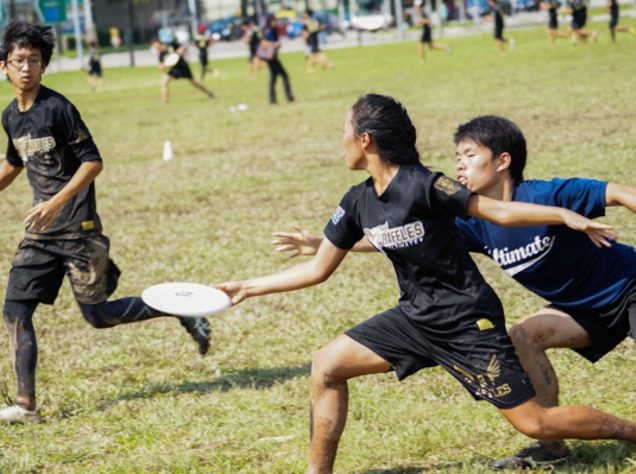
Before you can ride a bike, you’ve got to use training wheels, right? Well, the same deal applies to Ultimate — before you can play, you must be able to throw a backhand. At its very core, Ultimate is a sport that relies on the backhand for a mass majority of any given game’s throws. It’s quick, efficient, and simple, so it’s often the starting point for anybody that would like to learn the sport. And while you might know that the backhand is thrown across your body, beginners probably aren’t aware of all the nuances that go into an accurate, strong, and successful throw.
Have no fear, however, because CoachUp is here to help settle any lingering questions or doubts. So read this and get out there to develop your own personal habits, strategies, and technique!

The Beginning
After receiving or picking up the disc, the first thing that happens, whether your realize it or not, is the setting of your pivot foot. For those that aren’t familiar, your pivot works in the same way as it does in basketball after picking up your dribble. If you move that foot, you’ll be called for a travel and it will be a turnover or a reset of play. Generally speaking, right-handed throwers will set their left foot as the pivot foot so they don’t make the throw anymore awkward than it has to be. Of course, left-handed throwers should plant their right foot.
For the backhand in particular, this is an often crucially overlooked step and it makes the throw much harder than it has to because you’ll either be throwing across your body, or won’t be able to generate power from your back leg. Ultimately, your pivot foot doesn’t necessarily ruin your throw, but it’s such an easy mistake to fix that it’s worth noting here.
Next, you’ll want to make sure that your fingers are positioned in the right way — this might seem rather inconsequential, but it’s the foundation for any great throw. You’ll start with the placement of your middle, ring, and pinky fingers, as they should be wrapped around the bottom of the rim and will provide grip and power for the throw. CoachUp suggests that beginners use their index finger on the side of the rim to help make the follow-through a routine and guide the disc towards its destination. Finally, drop you thumb on top of the rim to steady the entire thing during the motion. Once you become more comfortable with the full motion, you can drop the index inside with the other three fingers for more power.
The Middle
Now that you’ve got the grip down, it’s time to move onto the physical throw. With your foot correctly pivoted and the hand fully gripped, step towards your target, and bring the disc across your body. Ideally, you’ll only cock the disc back towards your left side for the necessary amount of power. You don’t want to make a short pass too hard, or a deep throw too weak — this, of course, will take a trial and error period, but comfortability will come soon enough. As you move your arm back across the body for release, make sure to keep your arm straight and level. To borrow from another sport, imagine it as a similar process to swinging an effective baseball bat. Generally speaking, you want to have a level bat whenever possible in order to make solid contact with the ball and avoid weakly grounding or flying out.
This ideal carries over to Ultimate as well — if you’re not releasing mostly straight and level across your body, the disc may go directly into the dirt or floated up for an easy interception. Additionally, this will contribute towards your accuracy and distance as well; otherwise, the disc will get caught in the wind or be too low for your receivers to snag. This is one of the most difficult processes for newcomers because it’s natural to release high, but working hard to dispel this habit early will prove dividends later on.
The End
You’ll want to release just as your arm is fully straightening out, this way you’ll be able to get the full torque and power behind your throw as you snap your wrist. Believe it or not, your release point is pretty important — if you release too early, you’ll end up with a floaty pass off the mark; but if you release too late, you’re almost guaranteed to throw the disc erratically and far away from your target in question. Again, this will vary slightly from person-to-person, so find out what works with you. Finally, your task is not done even though the disc as been released! Be sure to follow-through with your attempt, just as you would after a free-throw in basketball. It may seem inconsequential, but following through is a simple, favorable habit to get into. It helps reinforce good spin, a full motion, and pinpoint accuracy, so don’t overlook it. The more you can make these difficult throws feel like a routine, the easier they’ll all become over time.
(Related: Read about executing the forehand throw here.)
Huddle Up
Once you get to the bottom of it, there’s no avoiding it: the backhand throw is the foundation that all Ultimate is built from. Sure, the forehand throw is a little flashier, but you’ve got to start somewhere, right? Even so, some players are so excited to move onto more technically advanced throws that they forgo the full necessary training with the backhand. Then, all of a sudden, they can’t make the simple throws, cause easy turnovers, and become a one-trick pony. In order to be the best Ultimate player you can be, you must have confidence in your backhand as it’ll likely become your trusty, reliable sidekick.
If you’re still having trouble with the backhand or want help identifying some of your issues, consider booking one of CoachUp’s private trainers to get you on the right path. Our established and knowledgeable team has decades of Ultimate experience under their belts, so they’re well-versed in the backhand’s importance. This is a no-brainer for any aspiring athlete because the backhand will make your life so much easier in future games, practices, or drills — so what are you waiting for?
(Thanks to Major League Ultimate for the gif!)
Be prepared for the biggest moments by mastering the small ones off the field.
How useful was this post?
Click on a star to rate it!
Average rating 0 / 5. Vote count: 0
No votes so far! Be the first to rate this post.


