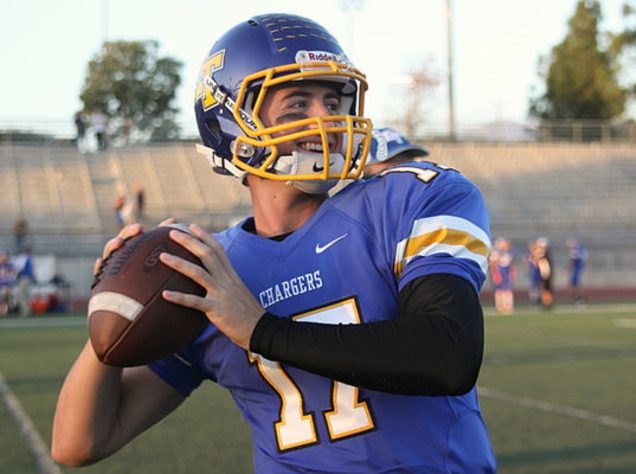
I learned each of the following mechanical techniques and drills from college and pro quarterback coaches over the years. No quarterback is perfect, but my training plan is designed for pushing athletes to perfect simple points of emphasis in every drill we do. These points of emphasis provide passers with the opportunity to produce and replicate a consistent release and improve accuracy. A QBs throwing motion should always be comfortable, but hitting each of these points is paramount to mechanical success.
Throwing Point #1: Carriage – Good Ball Control & Posture – Quiet Upper Body & Athletic Lower Body
The proper carriage sets the foundation for your throwing motion. A correct and consistent carriage will provide you the initial base needed to produce a repeatable arm circle. Right-handed QBs should carriage the ball comfortably on their right peck with elbows relaxed and pointed toward the ground. You do not want the ball too close to the body, nor extended too far from the chest. A ball held too close to the chest will impede the initiation of the throwing motion. Holding the ball too far away from the chest will cause balance issues and tend to draw your upper body toward your toes.
Upper body posture is very important to the carriage. I like to see consistent carriage and upper body posture throughout the drop back, step-ups, and resets. This provides a consistent platform to trigger the throwing motion. Below the waist, I like to see an athletic knee bend and active feet. Imagine a duck gliding across a pond; looking at his torso you would never guess how hard his legs are working to keep him moving. That is the action quarterbacks should be looking to replicate.
Coaching points: Quiet upper body and athletic lower body. Separate the footwork from your upper body carriage and ball at peck.
Throwing Point #2: Short stride off target line – Get hip clear to target
Transitioning from carriage to starting the throwing motion requires you to work from the ground up. The two primary things I look for from the lower body is that the stride length is not too long, and that it falls just outside of the target line. The short stride keeps you upright and over the top in your delivery. Most long-stride QBs seem to have a problem keeping their elbow above their shoulder and never seem to have the nice high release I am looking for. If you are an over strider, try shortening your stride by ½ of the length of your foot to start, and see if that raises your release point.
Point two concerning the stride deals with landing the stride just outside of the target line. Darin Slack refers to this as stepping in one side of an 18-inch hallway (distance from shoulder to shoulder of the receiver). This allows the QB to clear his hips and point them at the target, while preventing the front hip from blocking the torso. This blocking of the torso inevitably causes the arm to slide away from the shoulder and body. You will see a lot baseball players struggle with this, because they are used to throwing against a stiff front leg and dropping into a sidearm delivery. That is productive if you are trying to throw a cut fastball, but that motion paired with the oblong shape of a football causes accuracy issues. To keep the flight of the football on a consistent line, an over-hand release is preferred.
Coaching points: Step just off your line and give your hips room to clear.
Throwing Point #3: Short circle – push the ball up and back
Once the QB has begun the correct stride and has his hips opening to the target, he must trigger the arm circle. I am looking for a compact short circle from the carriage to a loaded position. I do not want to see the ball drop below the chest. Ideally the QB should push the ball up and back away from the peck. This will shorten the arm action and quicken the release time. Once the front hand breaks from the ball, it is now a race to the receiver between the ball and the defender. Here we can use the non-throwing hand to help initiate the arm circle, pushing the ball up and back as we break the carriage.
Coaching point: “Up and back” not “down and around.”
Throwing Point #4: J Path – Point the nose of the ball up and away from the target
Once we push the ball up and back, we must begin the “J” path. Here, the nose of the ball should “draw” a small “J” as the QB turns the front point of the ball away from the target, exposing the belly of the ball to the sky. This is like a pitcher being taught the goalpost position in baseball.
Coaching point: Get the nose of the ball pointing up and away from target.
Throwing Point #5: “Get the ball to Zero” -Darin Slack – Drop the ball behind shoulder and pull elbow to ear
With the elbow above the shoulder, I would like to see the ball dropped behind the throwing shoulder and the throwing elbow should begin to migrate toward the ear hole of the helmet. The QB should feel very little strain on his elbow and all arm muscles should be very relaxed and loose. Some of this goes back to the overall flexibility of your QB, but I like to see a nice fluid arm action, not a muscled and tense delivery.
Coaching point: Drop the ball to Zero.
Although, there are many trains of thought on the throwing mechanics of the QB position, perfecting these key points will help you improve your release and accuracy.

With our 100% money-back guarantee and vetted coaches, anyone can achieve their full athletic potential. CoachUp is the safest and easiest way to find a coach for personalized training. Find your perfect coach today and become the athlete you want to be!
How useful was this post?
Click on a star to rate it!
Average rating 4.4 / 5. Vote count: 7
No votes so far! Be the first to rate this post.


2 Responses
How do I stop short arming my throws?
How about other throwing activities, like Javelin?