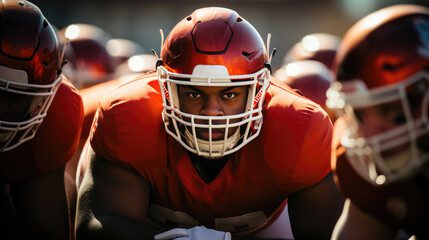
You can always get better, especially in the offseason! After you’ve separated from the team and have hung up your pads for the year, there are still a variety of ways to improve your defensive line play. It is typical for a defender to spend their entire offseason in the weight room, but you won’t need one for any of these drills.
The following drills are ones that you can use to improve get-off reaction, hand speed, explosiveness, separation, leverage, and pass rush without the use of helmets and shoulder pads. Whether you’re training inside during the winter or outside during the spring, these drills can be applied at any place and time during your football training session.
The Foundation of a Solid Defender: Stance and Start Drills
Drill #1: The Ball Drop
Purpose: Improve reaction time during the first step of get-off with a secondary emphasis on shooting hands to attack a blocker.
Equipment: You’ll need least two tennis balls or any type of rubber ball—no bigger than the palm of your hand—which also provides a good bounce.
Set-Up: Establish a visible line of scrimmage. Separate the defensive line into two single file lines at your line of scrimmage. The coach stands between both lines of players, each 4 yards away, with one tennis ball in each hand.
Execution
Then the coach will extend both of his arms out to the side at shoulder height with a ball in each hand. The two defensive linemen who are ready to go will get into a three point stance crowding the line of scrimmage. Each player will be lined up directly in front of the coach’s left and right hand. Both players will key the hand directly in front of them and when the coach opens his hands to drop the balls both players will fire out of their stances. After firing out, each player must shoot their hands out, lock the elbows and catch the ball after one bounce.
Coaching Point
Continue to emphasize a good first step and a flat back for pad level. The way I teach a good first step to my defensive line is by telling them that their first step should always replace the down hand (same hand same foot concept). If pad level becomes too high, start dropping the balls a little closer to the ground. As you see improvement, back up a yard. Use a track if available or push the balls to the grass instead of just dropping them.
Drill #2: Shield Hand Violence
Purpose
Improve hand speed from the ground and locking out an opponent.
Equipment: Three hand shields
Set Up
Have three players hold one shield each. One defensive lineman will line up on all fours in a six-point stance with fingers touching the ground. The players holding the shields will line up directly in front of the defender in the shape of a triangle, two shields side by side and slightly turned in towards the defender. The third shield is centered directly behind the front two.
Execution
The coach designates one of the front two players holding the shields to start the drill. On the coach’s signal the player designated to begin the drill will quickly step towards the defender with his shield. The defender must shoot his hands from the ground as quick as possible and quickly lock out the pad and return his hands to the ground directly after. The player holding the shield will slide off to the side and the second player holding the next shield will quickly step towards the defender in the same way the first player did. The defender repeats the same action with his hands. Finally, the player holding the third shield will step straight ahead towards the defender and the defender will finish the drill by fully locking out the pad with a flat back and eyes up.
Coaching Point
The eyes, head, and thumbs of the player should be up every time the defender shoots his hands and locks out the pads. Hands should quickly recoil after each strike and fingers should go back to the ground before striking the next pad. On the last pad, the defender should never allow his body to touch the ground while locking out — defensive linemen can’t make plays lying on their stomachs.
Drill #3: Wipe Drill
Purpose
To teach defensive linemen how to regain leverage from a defeated position and escape the blocker when the ball is more than two gaps away.
Equipment
None
Set Up
Split the players up into two lines, one offense and one defense. The players will partner up and run the drill one group at a time. The side designated as the defense will get into a “fit” position (eyes and thumbs up grabbing the V of the neck with bent elbows and knees) with the blocker. The blocker will grab the defender on his shoulders and place his head on the shoulder of the defender in the direction they are going. If the defender is going left then the blocker’s head is on the defender’s left shoulder.
Execution
Each defender will start out going left. On the coach’s command, the blocker will sprint laterally to his right and do his best to reach or cut off the defender. The defender must immediately lock out the blocker and push with his left hand. Once the defender locks out and gets his face to the left, he will execute a wipe by taking his right hand off the blocker and use the inside of his forearm to come across the wrists of the blocker as hard and quick as possible to knock his hands off and to get the defender’s shoulders and momentum finishing in the direction of the ball carrier.
Coaching Point
The blocker must hold the defender tightly and not just let go when the wipe is executed – make him work! The wipe cannot be executed until the defender has locked out the blocker. Remember to keep good pad level.
Drill #4: Base and Steer
Purpose
Teach understanding of feeling leverage, leverage change, and regaining leverage.
Equipment
None
Set Up
Players partner up and coach decides which side is defense. The coach will stand behind the defense so that the blockers can see him.
Execution
The defenders are in the “fit” position and the blockers have their hands on the defender’s shoulders while being able to see the coach. On the whistle, the coach will point left or right and the blockers will begin blocking their defender in that direction. The defender must lock out the blocker and regain leverage by getting the blocker’s shoulders turned. The coach will blow the whistle to stop them where they stand, and blow the whistle and point in the opposite or same direction to get them started again.
Coaching
Point Keep good pad level. Stress the first step in this drill and do not allow my defensive line to shuffle; we want to always create a new line of scrimmage (LOS). On the last rep give two quick whistles that tell them to rip and escape the block.
Drill #5: Tag Drill
Purpose Emphasizes closing the distance, aiming point, pad level, and bending towards the quarterback in pass rush. It teaches the defensive line how to rush, half their man and stay on an edge.
Equipment Four cones and four tennis balls
Set Up
Establish a Line of Scrimmage, or LOS, as a starting point for the defenders. Place each cone four yards behind the LOS. Place each towel or tennis ball slightly behind and to the right of each cone. Each player will line up at the LOS to the left of each cone. Another player will line up as an offensive lineman opposite the defender.
Execution On the coach’s command, the offensive player will kick step or back pedal towards the cone as fast as he can. The defender must get off with low pad level and beat the blocker to the cone. The defender must be able to dip his right shoulder and pick up the towel or tennis ball behind the cone.
Coaching Point
- Stage #1: Just use cones and balls, no blocker.
- Stage #2: Cones, balls, blockers.
- Stage #3: Just blockers going straight back.
(Related: Learn about working out like Julian Edelman here.)
Huddle Up
All in all, these drills might not be as exciting as helping your team score a seventy-yard touchdown, but you’ll never reach that point if you don’t put the time in fundamentally. These drills will put your mettle to the test, crucially identifying what you need to work on and what you can perfect. Seriously, grab a friend and get to work, that way, you’ll have someone to hold you accountable as well! Remember, sloppiness now will lead to sloppiness on the field too. Practicing good habits now will pay dividends when it matters the most, so don’t cut corners now.
If you’re still struggling with these drills, considering booking one of CoachUp’s private trainers to help you out! Our professionally trained coaches have the knowledge, experience, and ability to teach you through some the most difficult techniques and strategies — what are you waiting for?
Be prepared for the biggest moments by mastering the small ones off the field.

With our 100% money-back guarantee and vetted coaches, anyone can achieve their full athletic potential. CoachUp is the safest and easiest way to find a coach for personalized training. Find your perfect coach today and become the athlete you want to be!
How useful was this post?
Click on a star to rate it!
Average rating 4.8 / 5. Vote count: 9
No votes so far! Be the first to rate this post.


3 Responses
Any information or just coaching defensive ends
Check out D-Line University, Coach Craig Roh. God rest his soul
Best Dline/Dend content out there
These are great- but some photos or diagrams would make each drill much clearer!